


26 Sep 04. Electrical Things!
This Episode
- Run electrical wire for shore power outlet
- Run wire for power inverter
- Run 12V wire for LED lights, USB chargers
The parts…. see below for a complete list!

DROK® 0.56” DC 3-30V Digital Voltmeter
12 Terminal Ground Distribution Block Kit
BESTEK 1000W Power Inverter Dual AC Outlets
Blue Sea Systems Dual USB Charger Socket
18 AWG Gauge Stranded Hook Up Wire, 100 ft Length, Red
18 AWG Gauge Stranded Hook Up Wire, 100 ft Length, Black
RV Trailer Camper Electrical Hidden Power Battery Mount TORK LIFT A7703
Ceiling LED lights
Dream Lighting 12Volt LED Panel Light with Switch – 5″ Warm White

The fused switch panel I’ll be using for all the 12V circuits..
Sundely 6 Gang 12V/24V Waterproof Rocker Switch Panel with Blue LED (Yamaha Blue!!)

Main circuit breaker that is in-between the 2nd battery and the fused switch panel.
Bussmann (CB185-100) 100 Amp Type III Circuit Breaker

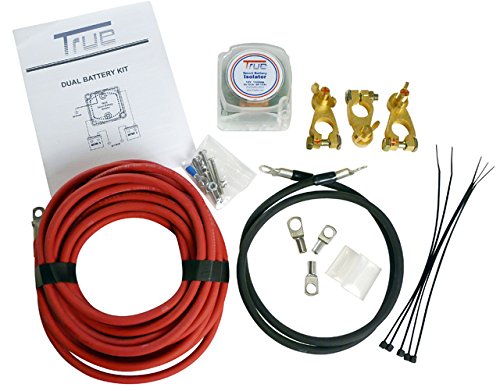
Smart Dual Battery 140A Isolator Kit by Jaycorptech.com.
That’s the main electrical parts used in my MotoVan build… of course, all the electrical connectors, wire loom, gromets, etc. Most of these small items I was able to get at the local hardware stores.
Now time to pull cable! Here you can see how I ran the shore power Romex and low voltage 18awg wire. Almost all of the 12v wire I ran inside wire loom to protect it. Behind the driver seat I will have a shore power outlet, dual USB port and my 1000W power inverter.
In the photo, the larger gauge red/black wire will feed the inverter, the small gauge red/black feeds the USB port & the yellow Romex is for the shore power outlet.

Using small clips to hold the wire loom in place..

Keeping the wires nice and neat. Also take photos of all your installed wiring, this will help you locate it incase of an issue later down the road!

On the other side, the passenger side I ran 4 runs (black/red wire), two runs for two ceiling lights, one for dual USB port, and one for some custom LED string lighting that will go above the side doors. In the cargo area, I ran two circuits that will feed a new dome light, a dual USB port and another shore power outlet. The dome light, I moved to more LED string lighting that looks really cool.. well here it is!!! So when the doors open these lights come on instead of the dumb dome light..

Finished attaching all the LEDs..

The lighting looks so stellar with these..

And here you can see the new cargo light, I used one of the 5″ LED lights, this way I can turn this light on and it will stay on after the dome timer goes off, it’s worked great.

Next post… back to finishing the paneling and electrical connections!
No Comments